


Florist's Tips: Drying Your Flowers Part I
Posted by Rose & Blossom on 28th Apr 2016

Bought a bouquet from Rose & Blossom? Or were you gifted the gift of flowers fresh from our Spokane or Spokane Valley flower shop locations? It’s a joy to have flowers in the house. They spruce up any table. They accent our mantles. They bring brightness and life into our homes. However, fresh cut flowers don’t last forever, they’re destined to wither over time. Don’t fret! You can dry the petals of your flowers! Here’s what you’ll need to do to save those beautiful petals:
Step One: Time Your Petal Picking
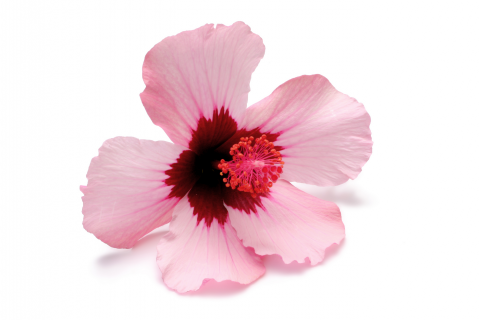
Find the flowers that look best for drying. Try to find flower petals that are full of color, and avoid petals that are brown or damaged. Roses are the most common candidate for petal drying, but most flowers can be dried with success! Experiment with all of your favorite flower petals to see what works best! Again, you’ll want to avoid petals that have begun to deteriorate. So the moment your flowers have begun to wilt on your bouquet is the moment that you ought to get to drying!
Step Two: Pick Those Petals
Okay, now it’s time to pick your flower petals. Use scissors to cut off flower petals that you’d like to dry. You can try to pull off petals if you’d like, but they’re liable to tear. Find the most colorful, lively looking petals. You’ll want to avoid petals that are too moist, as well as petals that are too dry (it’s likely that dry petals are already wilted anyway). Your petals may be too moist if you can feel moisture by lightly squeezing a petal. If that’s the case, keep your flowers away from moist air for a day or two (but keep them in water in the meantime).
Step Three: Get Drying!
It’s time to dry your petals.There are two techniques that are tried-and-true. The first is the au naturale technique: Air Drying. The second is the fast technique: Microwaving (we’ll go over the microwave petal-drying technique in our next blog).
 Air Drying Your Flower Petals
This process will take a couple of days, so be prepared to make a little bit of time for yourself! Gather up all of your favorite flower petals, and then grab a surface to dry your flowers on. You can use a window screen, a flat strainer, or anything with narrow grating to dry your petals (just make sure that it has a flat surface, you won’t want your petals to overlap as they dry). Next, it’s time to spread out your petals. Place petals along the surface so that they don’t touch… Otherwise, they may stick together. Then, it’s time to dry! Place your petals and drying rack in a place that has plenty of fresh, dry air. Avoid spaces that are moist, and avoid places that get direct sunlight (your petals may brown or turn black). Try to find a location that gets a little air flow; although too much airflow will cause your petals to fly away! As your petals dry, you’ll want to flip them. Flip your petals at least once per day to ensure that they dry evenly. After a few days, your petals should be perfectly dry! Take note, these petals will be especially fragile, so use them for crafts with caution!
Check back soon for our next florist’s blog surrounding microwave-drying your flower petals!